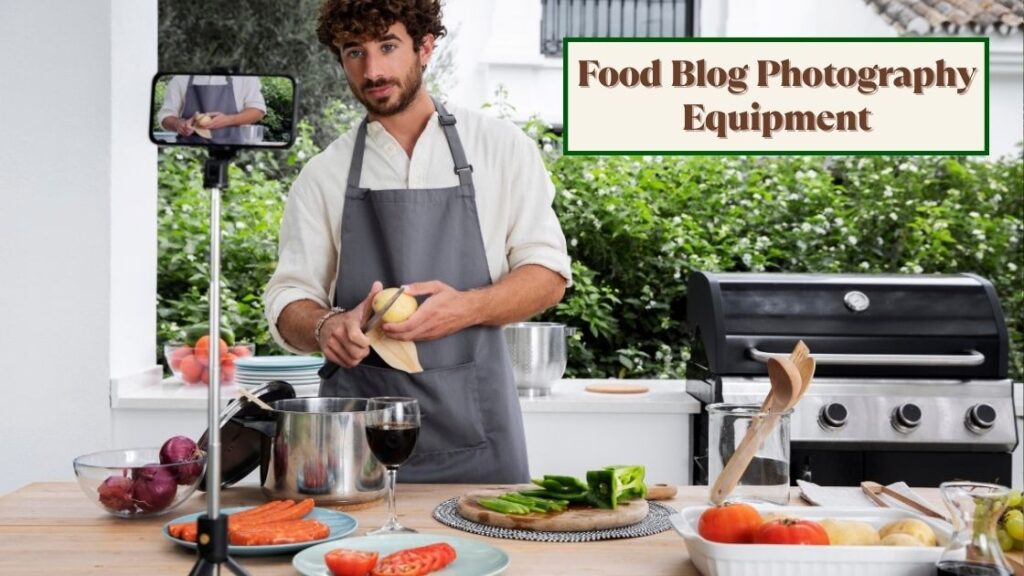
Your food photographs are the first thing readers judge and frequently the only reason they stick around to try your recipe. The right food blog photography equipment includes a mirrorless camera body, a sharp prime lens (50mm or 100mm macro), soft directional lighting, a sturdy tripod with overhead capability, neutral backdrops, and a dependable RAW editing tool. You can build a capable starter kit for under $500 or invest in a professional-grade setup beyond $3,000, depending on where your blog stands today.
Quick-Pick Gear Summary:
- Best beginner camera: Sony a6400 (~$700)
- Best first lens: 50mm f/1.8 prime (~$200)
- Best budget lighting: Godox SL60W LED panel (~$120)
- Best tripod for food shots: Manfrotto 055 with horizontal column (~$200)
- Best editing software: Adobe Lightroom Classic (~$10/month)
I have spent over six years photographing recipes for independent food blogs and commercial clients, testing more than 40 camera-and-lens combinations, a dozen lighting rigs, and countless backdrop surfaces in real kitchen environments. Expensive gear alone never rescued a poorly planned shot. Knowing which tool solves which problem is what actually elevates your images.
According to the Orbit Media Studios 2023 Blogging Survey, bloggers who incorporate multiple high-quality original images per post consistently report stronger engagement metrics than those relying on stock assets or unedited snapshots. For food content specifically, this gap widens dramatically readers decide within two to three seconds whether a dish looks worth making based entirely on the photograph.
This guide breaks down every essential category of food photography gear, explains precisely where to invest and where to save, and includes hands-on recommendations from real kitchen shooting experience.
Table of Contents
Why Investing in Proper Food Photography Gear Pays Off
Better equipment produces sharper detail, richer color accuracy, and greater depth-of-field control the three visual qualities that keep readers scrolling through your recipe posts rather than bouncing to a competitor. Google’s helpful content documentation confirms that overall page quality, including image presentation, factors directly into how content gets evaluated for search rankings.
Many beginning food bloggers start with smartphones, and modern flagship phones do capture respectable images when lighting cooperates. However, dedicated food blog camera equipment unlocks capabilities that no phone can fully replicate: true manual exposure control, interchangeable optics for different shooting angles, optical background separation, and uncompressed RAW capture that preserves maximum editing flexibility.
Related Article: Advanced Food Photography Styling Tips Every Serious Photographer Needs to Know
Food photography educator and author Joanie Simon whose YouTube channel The Bite Shot has taught lighting and styling techniques to over 500,000 subscribers frequently emphasizes that understanding light behavior matters more than owning expensive gear. That principle guided my own gear purchases over six years of food blogging, and it should guide yours.
From firsthand experience, upgrading from a smartphone to even an entry-level mirrorless camera transformed my recipe images within a single week. Colors rendered more faithfully, backgrounds dissolved into creamy blur, and I stopped losing shots to sluggish autofocus under dim kitchen lighting.
Best Camera for Food Blogging: How to Choose
The best camera for food blogging provides manual shooting modes, reliable autofocus, strong low-light performance, and RAW file output. Mirrorless systems have largely overtaken DSLRs as the preferred format among food content creators because of their compact bodies, electronic viewfinder exposure preview, and silent shutter capability.
Mirrorless vs. DSLR for Food Photography Setup
Mirrorless cameras project a real-time exposure simulation through the viewfinder or rear screen. You see exactly how your final image will look brightness, white balance, depth of field before pressing the shutter. DSLR cameras display an optical view of the raw scene that does not reflect your exposure settings until after capture.
For tethered overhead shooting an increasingly standard workflow in food blogging both systems perform identically because you preview images on a connected laptop or tablet regardless of viewfinder type.
Food Blog Camera Recommendations by Budget Tier
| Budget Range | Suggested Models | Sensor Format | Key Strengths for Food Work |
| Beginner ($500–$800) | Sony a6400, Canon EOS R50 | APS-C | Fast hybrid autofocus, lightweight body, 4K video for recipe Reels |
| Intermediate ($1,000–$1,800) | Fujifilm X-T5, Nikon Z6 III | APS-C / Full-Frame | Exceptional color science, weather-sealed build, dual card slots |
| Advanced ($2,000+) | Sony a7 IV, Canon EOS R6 Mark II | Full-Frame | Wide dynamic range, rapid burst shooting, professional construction |
Full-frame sensors gather more light per pixel, producing richer tonal gradation and smoother background separation qualities that flatter plated food beautifully. APS-C sensors deliver impressive results at lower cost and remain a perfectly capable choice for bloggers focused on value.
Personal experience note: I photographed my first two years of food content on a Fujifilm X-T3 (APS-C) and only transitioned to full-frame when commercial client work required it. The image quality gap exists, but it is noticeably smaller than most gear reviewers claim.
Food Photography Lenses: Focal Lengths That Matter
Your lens influences final image quality more than the camera body mounted behind it. For food blog photography lenses, prime (fixed focal length) options with wide maximum apertures between f/1.4 and f/2.8 deliver the sharpest detail and the most visually pleasing background softness, often called bokeh.
Here are the four focal lengths that cover virtually every food photography scenario:
- 50mm f/1.8 the single most useful starting lens for eye-level plating shots and three-quarter angles
- 35mm f/1.8 better suited for wider tablescapes, flat-lay compositions, and environmental kitchen scenes
- 90mm or 100mm macro essential for close-up texture detail on baked crusts, seed patterns, drizzled sauces, and garnish elements
- 24–70mm f/2.8 zoom a do-everything option spanning wide-angle through short telephoto in one barrel
Rental data published by Lensrentals consistently positions the 50mm prime and the 24–70mm zoom among the most frequently borrowed glass for commercial food and product shoots, reflecting their broad real-world usefulness.
Lens Comparison: Prime vs. Zoom for Food Blog Work
| Factor | 50mm f/1.8 Prime | 24–70mm f/2.8 Zoom |
| Sharpness (center) | Excellent | Very Good |
| Background blur quality | Superior (wider aperture) | Good |
| Versatility | Single angle only | Wide to short telephoto |
| Weight | ~175g | ~800g |
| Price | ~$150–$250 | ~$800–$2,000 |
| Best For | Budget-conscious bloggers, beginners | Bloggers who shoot varied angles per session |
Practical tip from experience: If you can only afford one lens, choose the 50mm f/1.8. It costs under $250 across every major camera system, delivers outstanding sharpness, and produces the classic food photography aesthetic that audiences respond to most strongly.
Natural Light vs. Artificial Light for Food Photography
Lighting matters more than any other single variable in food photography more than your camera body, your lens, or your editing software. The ideal food blog lighting setup produces soft, directional illumination that reveals texture, enhances natural color, and prevents harsh, unflattering shadows.
Natural Light Food Photography Gear
Diffused window light is where most food bloggers begin, and it remains a viable primary light source even for experienced photographers. Position your shooting surface beside a large window with sheer curtains or a translucent diffusion panel to get clean, even illumination at zero cost.
A north-facing window provides the most consistent natural daylight because it avoids direct sun exposure throughout the day. South-facing windows work too, but require diffusion material to tame the harder light during midday hours.
When Artificial Lighting Becomes Essential
Short winter days, overcast weather, and evening cooking schedules all create situations where natural light falls short. At that point, continuous LED panels or flash-based strobes become critical additions to your food blog photography equipment.
| Light Source Category | Ideal Use Case | Typical Cost | Popular Models |
| Continuous LED Panels | Beginners, video, real-time preview | $80–$400 | Godox SL60W, Aputure Amaran 100D |
| Flash / Strobe Units | Maximum power, freezing splashes | $150–$600 | Godox AD200 Pro, Profoto A2 |
| Ring Lights | Even fill light, overhead flat-lays | $30–$120 | Neewer 18-inch LED Ring |
| Softboxes and Diffusers | Softening any hard light source | $25–$150 | 5-in-1 reflector, Godox 60×60cm softbox |
Guidance from Digital Photography School recommends positioning your key light source at roughly a 45-degree side angle to the dish, which produces gentle directional shadows that give food a convincing three-dimensional, appetizing appearance.
Professional food photographer Andrew Scrivani, whose editorial work appears regularly in major publications, has noted in interviews that mastering a single-light setup teaches you more about food photography than owning a room full of equipment. That observation aligns with my own experience I produced my strongest early images using just one LED panel and a foam board bounce.
Budget-Friendly Diffusion Alternatives
Professional modifiers are not necessary when you are starting out. A plain white bedsheet clipped across a window frame, a $4 foam core board from any craft supply store, or a frosted shower curtain liner can soften harsh sunlight effectively. I personally relied on a foam board as my only reflector for over a year, and many working food stylists carry identical low-cost tools on location.
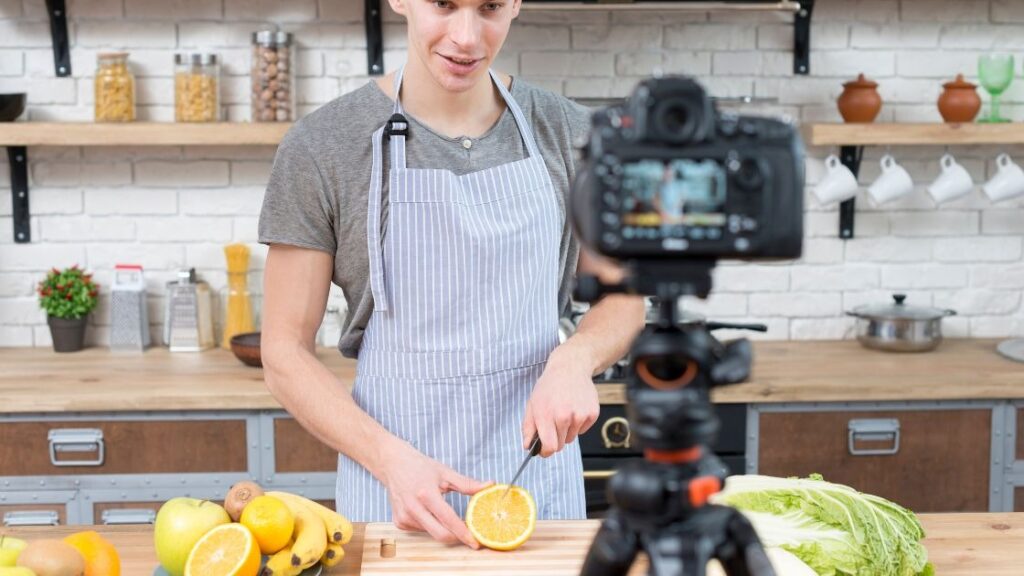
Flat Lay Photography Equipment: Tripods and Overhead Rigs
A dependable tripod removes camera shake entirely and frees both hands for adjusting garnishes, repositioning props, and fine-tuning composition between frames. When shopping for flat lay photography equipment and food blog tripods, prioritize models with a reversible or swing-out center column this feature lets you position the camera directly above the table for overhead shots without purchasing a separate rig.
The Manfrotto 055 series and the Benro Mach3 are two widely respected options in the food blogging community. Both support horizontal column positioning and comfortably handle the weight of a full-frame body paired with a heavy zoom lens.
For bloggers who shoot overhead frequently, a dedicated C-stand with a boom arm or a purpose-built flat-lay stand like the Fotodiox Pro overhead mount provides rock-solid stability and substantially faster setup than repositioning a standard tripod each session.
Experience-based tip: Invest in a tripod with an Arca-Swiss compatible quick-release plate. This standardized mounting system lets you swap between tripod, overhead rig, and handheld shooting in seconds without fumbling with proprietary adapters. It is one of the smallest upgrades that saves the most time over hundreds of shoots.
Backgrounds, Surfaces, and Food Styling Props
The surface beneath and behind your dish establishes the visual mood for the entire photograph. Vinyl photography backdrops, reclaimed wood planks, marble tile samples, textured concrete boards, and natural linen fabrics rank among the most widely used surfaces in food blog content creation.
Trend data from Etsy’s marketplace consistently shows that matte-finish, neutral-toned photography backdrops remain the best-selling accessories for food content creators year after year a strong signal that understated surfaces outperform busy or glossy alternatives.
Maintain a small, curated prop collection: a few ceramic plates in muted earth tones, mismatched vintage flatware, cloth napkins in natural fibers, small wooden cutting boards, and tiny bowls for garnish ingredients. The guiding principle is always restraint every prop should support the dish visually, never compete with it.
From personal practice: I keep my entire prop kit in a single plastic storage bin. If a new prop does not fit in the bin, something else must come out. This physical constraint forces intentional curation and prevents the visual clutter that weakens food photography compositions.
Smartphone Food Photography Gear and Accessories
Not every food blogger is ready to invest in a dedicated camera system, and that is perfectly fine. Current flagship smartphones particularly the iPhone 16 Pro and Samsung Galaxy S25 Ultra capture genuinely impressive food images when lighting conditions are favorable.
To get the most from smartphone food photography, consider adding a few inexpensive accessories:
- Clip-on macro lens ($15–$40) enables close-up texture shots that the phone’s native lens cannot achieve
- Smartphone tripod mount ($10–$25) pairs with any standard tripod for stable overhead and angled shots
- Bluetooth shutter remote ($8–$15) eliminates the micro-shake caused by tapping the screen
- Portable LED fill light ($20–$50) small panel that clips to the phone or sits on a tabletop stand
Research published by Counterpoint Research on mobile imaging trends suggests that computational photography improvements in recent smartphone models have narrowed the gap with entry-level dedicated cameras for well-lit still subjects. Food on a styled table under controlled lighting fits that description closely.
From experience: I still use my iPhone for quick behind-the-scenes stories and social media posts between proper camera sessions. The key is knowing its limitations smartphones struggle with true background blur, precise white balance control, and low-light consistency compared to even a budget mirrorless setup.
Video and Reels Equipment for Food Bloggers
Short-form recipe video content has become a major traffic driver for food blogs. Platforms like Instagram Reels, TikTok, and YouTube Shorts reward visually polished cooking clips, making basic video equipment for food bloggers a worthwhile addition to your gear collection.
The essential video-specific tools include:
- Continuous LED lighting (not flash) video requires constant illumination, making panels like the Godox SL60W or Aputure Amaran 100D dual-purpose investments that also serve your still photography
- External microphone ($30–$100) a Rode VideoMicro or similar compact shotgun mic dramatically improves audio quality for voiceover and ambient cooking sounds
- Gimbal stabilizer ($80–$200) a DJI RS series or Zhiyun Crane provides smooth handheld motion for dynamic recipe walkthroughs
- Memory card with fast write speed 4K video files demand cards rated at V30 or higher to avoid dropped frames
According to Wyzowl’s 2024 Video Marketing Statistics report, the vast majority of marketers consider video content to deliver strong return on investment. For food bloggers, recipe Reels and short tutorials serve double duty they drive social engagement and keep visitors on your blog pages longer, which strengthens search ranking signals.
Practical note: You do not need separate cameras for photos and video. Every mirrorless camera recommended earlier in this guide shoots 4K video capably. The real additions are lighting (which you already need for stills), audio capture, and stabilization.
Color Calibration and Tethered Shooting Tools
Two often-overlooked categories of food blog photography equipment are color management tools and tethered capture software. Both become important as your content standards and publishing volume grow.
Color Calibration for Accurate Food Images
Your monitor displays color differently than your camera captured it and differently than your reader’s screen will show it. A hardware color calibrator like the Datacolor SpyderX or X-Rite i1Display adjusts your editing monitor so that the whites, reds, greens, and skin tones in your food images appear accurate and consistent.
For in-camera color reference, a color checker card (such as the X-Rite ColorChecker Passport) placed in the first frame of each shooting session gives you a reliable white balance and color correction anchor during editing.
Professional food photographer Rachel Korinek who runs the popular food photography education platform Two Loves Studio recommends calibrating your monitor at least once per month and using a color checker at the start of every new lighting setup. This practice saves hours of guesswork during post-processing.
Tethered Shooting Software for Food Photography
Tethered shooting means connecting your camera directly to a laptop or tablet so that each captured image appears on a large screen within seconds. This workflow lets you evaluate sharpness, composition, and exposure at full resolution without squinting at your camera’s small rear display.
The two leading tethered shooting applications are Adobe Lightroom Classic (which doubles as your editing tool) and Capture One Pro (favored for faster tethering speed and stronger color handling). Both support live view, automatic file import, and real-time adjustment previews.
From my workflow: Tethered shooting changed how I approach overhead flat-lay compositions. Seeing the full image on a 15-inch laptop screen while styling the scene makes it dramatically easier to spot awkward prop placement, uneven spacing, and shadow problems before you shoot 50 frames and discover the issues later in editing.
Food Photo Editing Tools and Post-Processing Software
Even food photographs captured under ideal lighting conditions benefit from targeted adjustments to white balance, exposure, contrast, and color saturation during post-processing. The editing tools most widely adopted across the food blogging community include:
- Adobe Lightroom Classic the industry-standard RAW processor offering batch editing, custom preset creation, and a non-destructive workflow that preserves your original files untouched
- Capture One Pro preferred by commercial food photographers for its advanced color grading precision and seamless tethered capture integration
- Affinity Photo 2 a one-time-purchase alternative to Photoshop with professional-grade retouching and compositing capabilities
- Canva or Pixlr free browser-based editors suited to quick social media graphic adjustments and text overlays
- Snapseed a powerful mobile editing application ideal for on-the-go corrections when publishing from a phone
According to Adobe’s Creative Cloud ecosystem data, Lightroom continues to hold the largest share among independent content creators, driven primarily by its intuitive preset marketplace and seamless integration with Adobe’s broader creative suite.
Editing Workflow Tip from Six Years of Food Blogging
Develop two or three custom Lightroom presets that align with your blog’s visual identity, then apply them as a starting baseline for every new batch of recipe images. This approach maintains color consistency across your entire archive so a post from January looks cohesive next to one from September while reducing your per-image editing time from several minutes to under sixty seconds.
Memory Cards, Storage, and Backup Workflow
Reliable memory cards and a consistent storage system protect the work that your food blog photography equipment produces. Losing a full shoot to a corrupted card or a failed hard drive is a preventable disaster.
Choosing the Right Memory Card
For still food photography, any reputable UHS-I SD card rated at U3 provides sufficient write speed. If you also shoot 4K recipe video, step up to a UHS-II card rated V60 or V90 to prevent recording interruptions.
Trusted memory card manufacturers include SanDisk, Sony, Lexar, and ProGrade Digital. Avoid unbranded or suspiciously cheap cards from unknown sellers counterfeit cards are widespread on discount marketplaces and frequently fail without warning.
Backup Strategy
Follow the 3-2-1 backup principle: maintain three copies of every shoot file, stored on two different media types, with one copy kept offsite or in the cloud. A practical implementation for food bloggers involves keeping the original card until the shoot imports to your editing drive, backing up to an external hard drive the same day, and syncing finished files to a cloud service such as Google Drive, Backblaze, or Amazon Photos.
Building a DIY Food Photography Studio at Home
You do not need a dedicated room to create a functional food photography setup for beginners. A portable studio built around a folding table, a window, and a few inexpensive tools works beautifully in any apartment or kitchen.
Essential DIY Studio Components
| Component | Purpose | Approximate Cost |
| Folding card table (30″×30″) | Portable shooting surface | $30–$50 |
| Two foam core boards (white + black) | Bounce fill light / absorb light for moody shadows | $4–$8 total |
| C-clamps or A-clamps (4–6 pieces) | Secure backdrops and diffusers to surfaces | $8–$12 |
| Sheer white curtain panel | Window light diffusion | $5–$10 |
| Vinyl backdrop (2 contrasting tones) | Interchangeable surface textures | $10–$20 each |
Total investment for a functional home food photography studio: roughly $70–$120.
Position the folding table perpendicular to your largest window. Place a white foam board on the opposite side of the dish to bounce fill light back into the shadows. When you want darker, moodier images, swap the white board for a black one this absorbs light instead of reflecting it, producing deeper contrast.
From personal experience: My first 200 published recipe images were shot on a $35 folding table next to my kitchen window using exactly this DIY arrangement. Several of those early posts still rank on page one of Google Image results for their respective recipe keywords. Expensive studio space is genuinely unnecessary when you understand how to manage light and composition with simple, affordable tools.
Cheap Food Photography Equipment: Complete Starter Kit Under $500
You do not need a premium budget to begin producing polished food blog content. A practical starter kit built around pre-owned or entry-level food photography equipment can produce professional-looking recipe images at a fraction of the cost that gear marketing would have you believe.
Here is a realistic sub-$500 shopping list:
| Item | Estimated Cost | Recommended Sources |
| Used mirrorless body (Sony a6000 or Canon EOS M50 II) | $200–$280 | MPB, KEH, Facebook Marketplace |
| 50mm f/1.8 prime lens (or manual-focus equivalent) | $80–$150 | Amazon, Adorama (third-party brands like Viltrox, TTArtisan) |
| 5-in-1 collapsible reflector (43-inch) | $15–$25 | Amazon |
| Basic continuous LED panel (Neewer 660 or equivalent) | $40–$80 | Amazon, Neewer direct |
| Two vinyl photo backdrops (contrasting tones) | $20–$40 | Etsy, Amazon |
| 32GB UHS-I SD card (SanDisk Extreme) | $8–$12 | Amazon |
Total estimated cost: $363–$587
Upgrade incrementally as your blog grows. Add a macro lens once close-up detail shots become a regular part of your content. Invest in a quality tripod when you begin shooting overhead flat-lays consistently. Transition to studio-grade lighting once natural window light no longer fits your publishing frequency. Consider a color checker card once you are editing more than 10 recipe posts per month and want faster, more consistent results.
Conclusion: Build Your Food Blog Photography Setup Strategically
Choosing the right food blog photography equipment comes down to spending deliberately rather than spending heavily. A capable camera body, one sharp prime lens, reliable and well-diffused lighting, a clean set of backdrops, and a consistent editing workflow form the foundation that every successful food blog is built on.
Prioritize lighting and lenses over the camera body those two investments produce the largest visible leap in recipe image quality. Layer in a sturdy tripod, a small curated prop collection, and a dependable storage backup system, and you have everything required to produce images that hold reader attention and strengthen your search rankings.
Your gear will evolve alongside your blog. The setup that serves you at 50 published recipes will look very different from what you need at 500. Start with the fundamentals outlined in this guide, refine your technique through consistent practice, and let your growing skill level not gear marketing pressure dictate when each upgrade genuinely makes sense.
What camera should I buy first for food blog photography?
A mirrorless camera with full manual controls and RAW file output is the strongest starting option for any food photography setup for beginners. Budget-friendly models like the Sony a6400 or Canon EOS R50 deliver fast autofocus, accurate color reproduction, and sufficient resolution for web publishing, social media, and occasional print.
Is artificial lighting necessary for food photography, or can I rely on natural window light?
Natural window light produces beautiful food images and costs nothing. However, seasonal daylight limitations and unpredictable weather make artificial lighting particularly continuous LED panels a worthwhile investment once you need to publish on a consistent schedule regardless of external conditions. Many established food bloggers use both sources depending on the situation.
Which single lens gives the best results for food blog photography?
A 50mm prime lens with an f/1.8 aperture is widely considered the most versatile first lens for food blog work. It renders natural-looking perspective at table-level angles, creates smooth background blur that isolates the dish, and is available for under $250 across nearly every camera system on the market.
Can I run a serious food blog using only a smartphone?
Current flagship smartphones from Apple and Samsung capture genuinely strong food images in favorable lighting. However, dedicated camera equipment offers substantially more control over depth of field, white balance precision, and RAW editing flexibility advantages that become increasingly significant as your audience and content quality standards grow.
How much does a complete food photography equipment setup cost?
A functional beginner kit assembled from pre-owned and entry-level components typically costs between $300 and $500. Mid-range setups that include a full-frame camera body, a quality prime lens, and studio lighting generally fall within the $1,500–$2,500 range. Professional configurations can exceed $5,000, though that level of investment is usually justified only by commercial client work or high-traffic monetized blogs.
Do I really need photography backdrops for my food blog?
Backdrops produce a disproportionately large improvement in the consistency and professionalism of your food images relative to their very low cost. Owning just two or three versatile surfaces such as a light wood grain, a dark matte texture, and a neutral marble pattern gives you enough visual variety to keep your content cohesive and polished across hundreds of published recipe posts.
Do food bloggers need video equipment in addition to photo gear?
Short-form recipe video has become a significant traffic source for food blogs through platforms like Instagram Reels, TikTok, and YouTube Shorts. The good news is that most mirrorless cameras recommended for food photography also shoot capable 4K video. The primary additions for video work are continuous lighting (which you already need for stills), an external microphone for clean audio, and optionally a gimbal stabilizer for smooth handheld motion.